How to Make Great Travel Videos

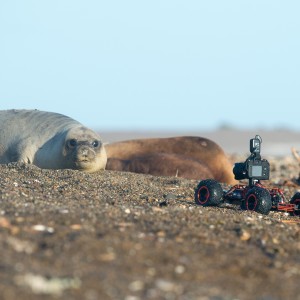
Radio controlled car with camera while photographing sea lion on the beach
Your study abroad adventure is a once-in-a-lifetime experience which you are going to want to record with some great travel videos and stills. Every international student wants to record memories of their time abroad, whether through blogs, journals or by posting on your favorite social media page or app. What is integral to this recording is the visuals. Nobody can quite grasp the look and feel of your stories without those travel videos and stills.
Over the past few years, Adventure Cameras has changed the game when it comes to travel photography and high-quality, high-resolution video. With its light weight, compact size, resilience, and flexibility – not to mention all those wonderful accessories and mounts – an Adventure Cameras camera has revolutionized travel photography.
Tips for shooting those great travel videos
Adventure Cameras are easy to use they are also known as action cameras. That’s the beauty of them. However, there are some easy-to-follow facts that make your photos and videos with an Action Camera look, well, totally pro! Here’s what to know about getting the best travel footage from your Adventure Camera.
- An Adventure Camera is not like all other cameras, and you need time to learn how to use it and to get used to it. There are some good guidebooks and tutorials out there, so take the opportunity to go through one of them and also to refer to the Frequently Asked Questions (FAQ’s) Section on the Go Pro or travel photography websites.
- Research what the right apps and mounts are to get the most out of your Action Camera video capabilities for the activities you know you will want to record on your travels. Whether it is road trips, hiking, biking or scuba diving, there is are apps and mounts which will help you get the best photographs of the experience. We have a list of great GO Pro Mounts that are universal for Action Cameras and Apps here.
- Use a selfie stick (in Adventure filming lingo this is called the Go Pro Pole). If you are a single traveler there will not necessarily be anyone around to record your experiences so it’s a must for solo traveling. Whether you’re standing in front of the Golden Gate Bridge or biking on Nantucket Island, you want to not only record the scene from your point of view (POV), you want to have you in the picture, too!
- Buy the best Action Camera you can afford. Each edition has progressively added more functions, reduced the negatives such as battery power and picture quality in low light, etc.
- Battery life is quite limited on most Adventure Cameras, so if you only have one battery, and you are on a long trip or extended activity where there is no way to re-charge your batteries, turn off your wi-fi.
However, there are definite advantages to using your Action Camera Wifi, as it enables you to get a slightly delayed preview of the shot you want, makes it easier to get the perfect settings for the shot, plus letting the camera run gives you more chances of getting that perfect shot.
- So, if you want the advantages that wifi offers, make sure you bring along more than one charged battery.
- Be ready for damp conditions – humidity, rain, fog, water immersion. Adventure Cameras have apps and waterproof cases which can be inserted and which can prevent fogging of the camera.
- One travel blog – world of wanderlust – has this handy tip to prevent water drops on the lens – lick the lens, it really does prevent drops from forming on the glass!
- Ensure all mounts and screws are fastened. Use a safety strap if necessary. You don’t want to lose the chance of a potentially great shot or footage, nor do you want to lose your camera! You can also purchase RFID or Bluetooth tracking stickers that will send a continuous signal to your phone to the location of your camera.
- Hold the camera steady, especially for videos. Mounts, of course, help with this but if you are taking a hand-held shot, using both hands to steady the camera.
- Use the time-lapse mode when setting up a picture. This is a great tool as you are given options of shots, angles, facial expressions that you can then select from.
- With video, take slow motion shots if you really want to capture the awesomeness of the experience.
- Edit your video and photos. Editing is the key to making your visuals look really professional.
Remember that even without those amazing apps, an Adventure Camera itself is an amazingly versatile gadget which will give you the travel videos beyond your dreams!
Thinking of going abroad to study English? Since 1998, TALK has brought students from all corners of the world together to the USA to learn English. Our vision is a world in which communication, understanding, co-operation and respect exist between people of all countries and cultures. At TALK, we believe the best way to learn English is to be fully immersed in American culture both inside and outside of the classroom. Learn More About TALK.


